Installing our WooCommerce importer
To link your WooCommerce store to your Transglobal Express account, please complete the following steps.
Step 1 – Getting WooCommerce Ready
To start with, we'll require you to provide us with read and write access permissions via the REST API. This will allow us to import your orders into the Transglobal system, and to mark them as complete once a shipment has been successfully booked.
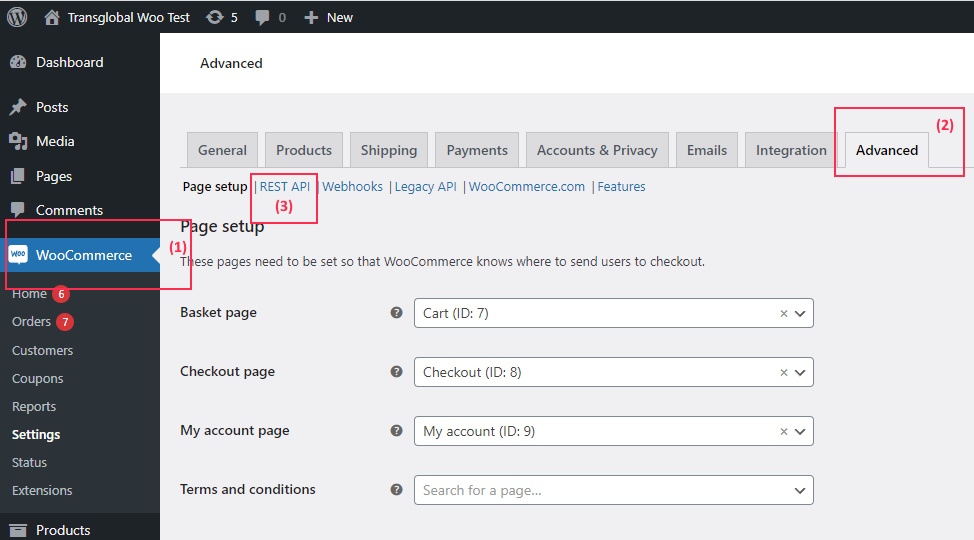
Go to your WooCommerce admin area. In the lefthand menu, click the WooCommerce option. In the submenu underneath, click Settings. This will open the settings in the main window. Under the Advanced tab, click the regular REST API link.
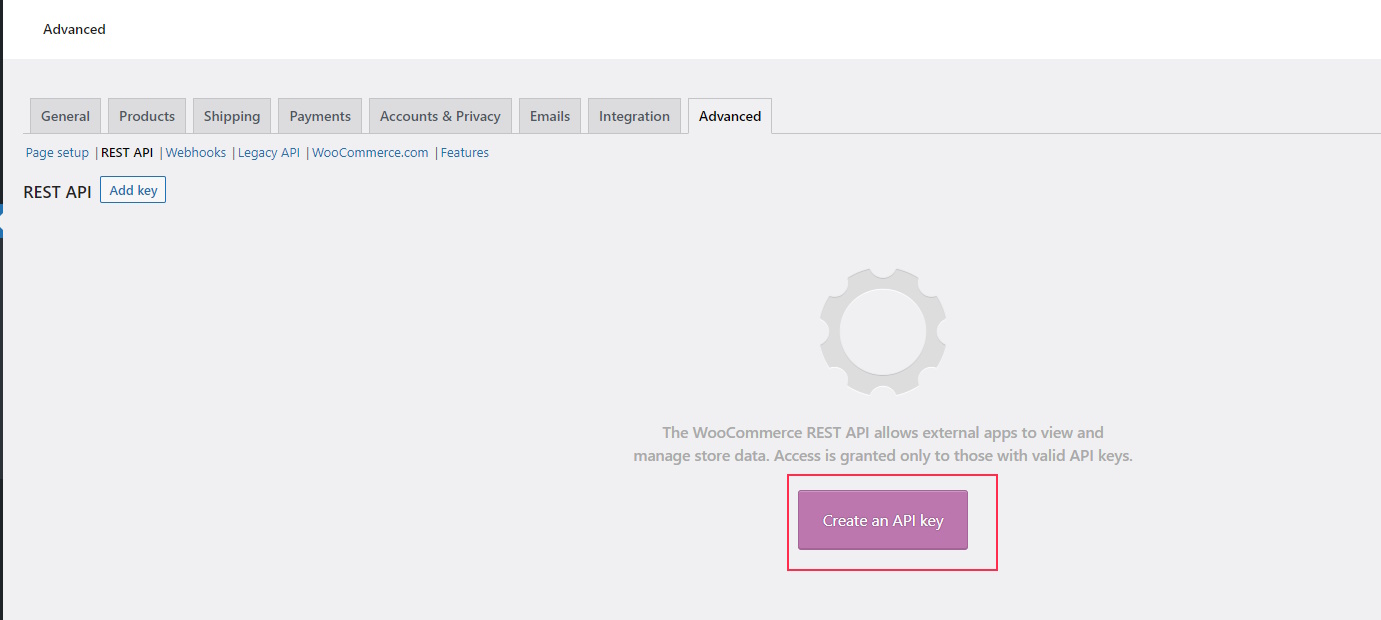
Then click on the Create an API Key button.
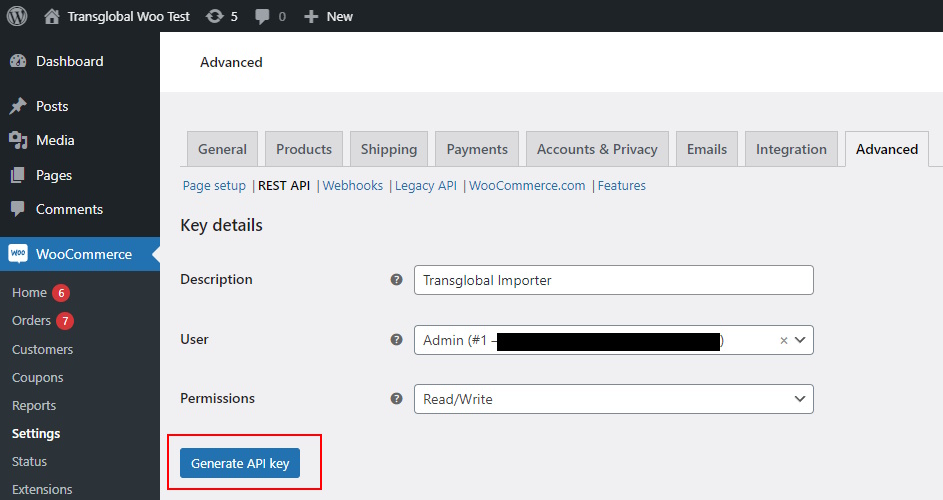
Fill out the Description field with a name you will recognise when you come back to it later (something relating to "Transglobal" would be advisable).
The User field should already be set, but if not, select a user from the list.
Please ensure you have selected the "Read/Write" option from the Permissions drop down list. Write permissions are required so that we can update your order status to "completed" once a shipment has been booked. Once all the fields have been filled, click the Generate API key button.
Once the button has been clicked, WooCommerce will generate your REST API credentials. Once successfully created, they will display on your page as below:
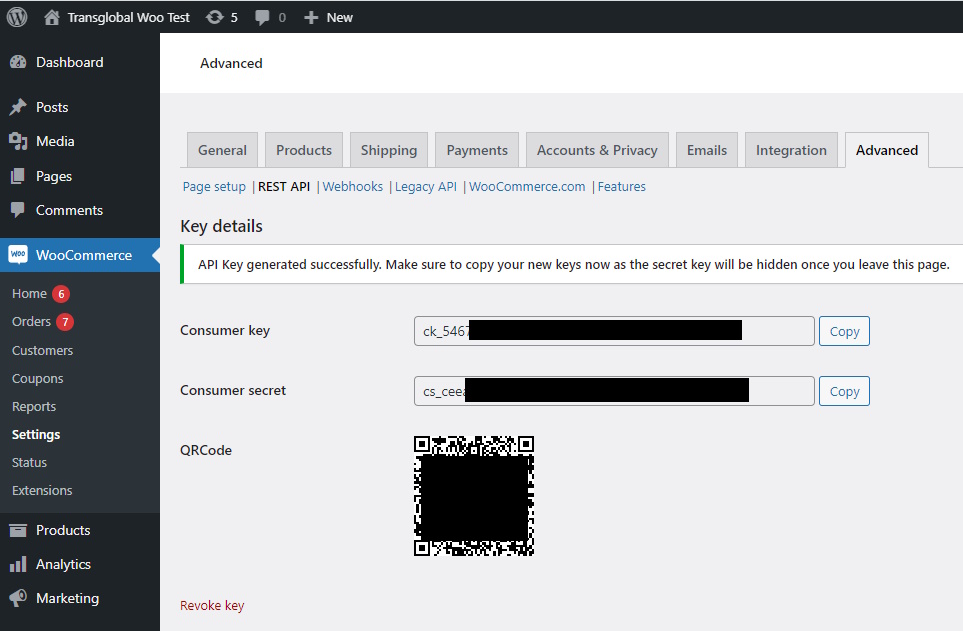
Important: Please make a note of your consumer key and secret before leaving this page. They will not appear in full again. If you lose track of them, you will need to delete your credentials and start over.
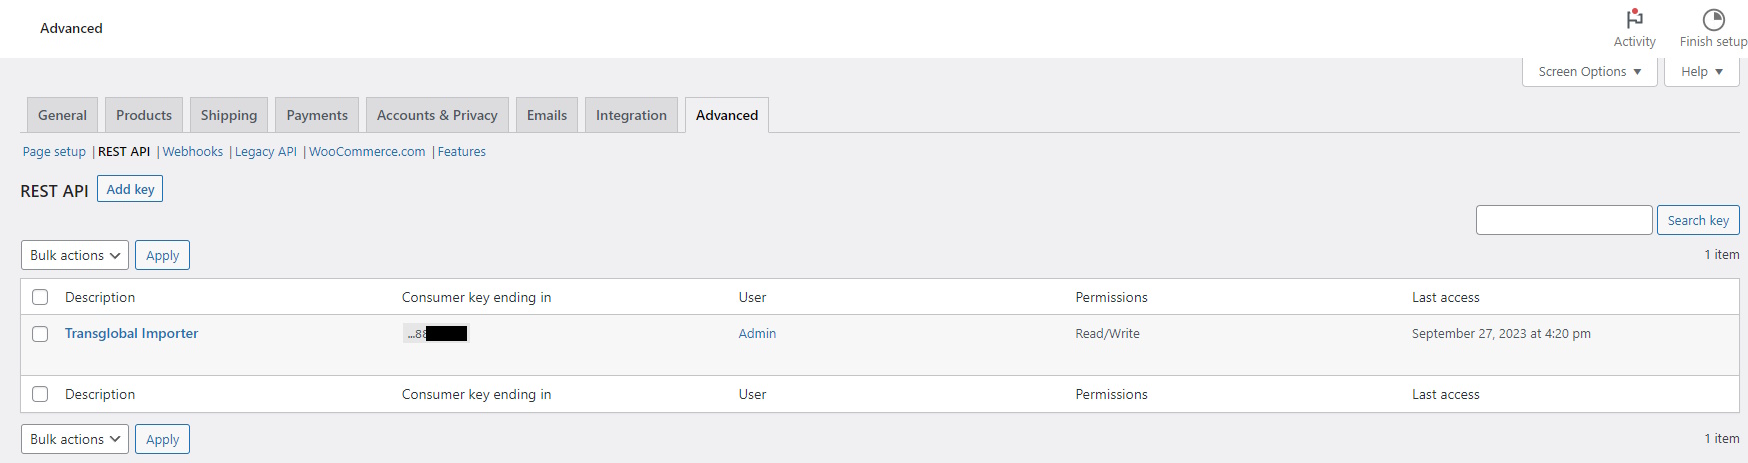
The next time you navigate to the REST API page, you will see a record of the API access you set up.
Permalink Setup
In order to be able to access your REST API to import your order data, it is necessary to change your "permalink" settings. We do not know the specific reason why this setting needs changing from its default value, but it is made clear in the Woo Commerce documentation that the REST API cannot be used on the default "plain" setting for permalinks. See the following:
To update your permalink settings on your WooCommerce admin, click the Settings link in the lefthand menu, then Permalinks in the sub menu that will appear underneath it. "Permalinks Settings" should open in the main window pane.
According to the documentation, any option but "Plain" will allow for REST API usage. Please note: we are not experts in the WooCommerce system; we do not know fully how the permalinks structure is used, nor the implications (if any) for the rest of your store.
We do know that it is a necessary change to make in order to be able to access the REST API. We have tried it without changing the permalinks settings and it is not possible. If you wish to make use of the Transglobal WooCommerce importer, this change is necessary.
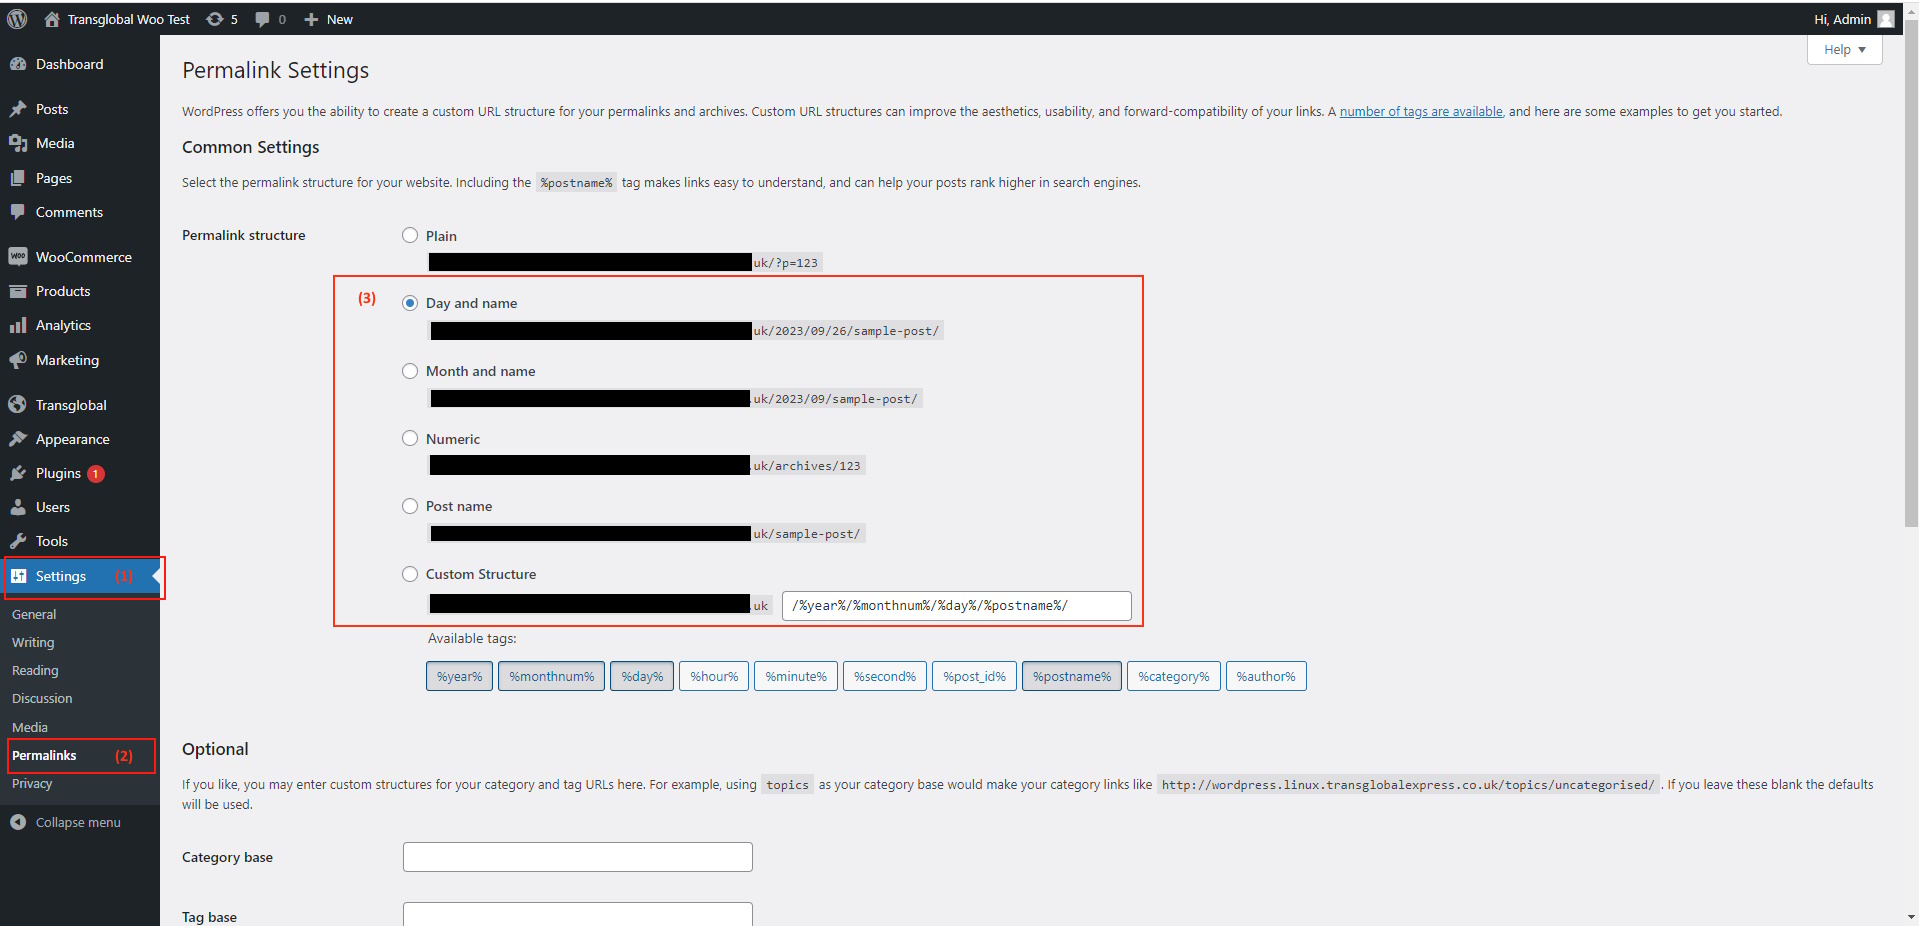
Once you have selected your preferred permalink option, click the Save button at the bottom of the screen.
Setting Special Attributes (HS Code, Country of Origin)
Often when booking shipments, it will be necessary to provide harmonised codes (sometime referred to as commodity codes) and/or a country of origin for the products being sent. WooCommerce by default does not provide a field to input this data, so in order to allow this to be set, without having to fill out this information every time you want to book a shipment, we make use of "Special Attributes".
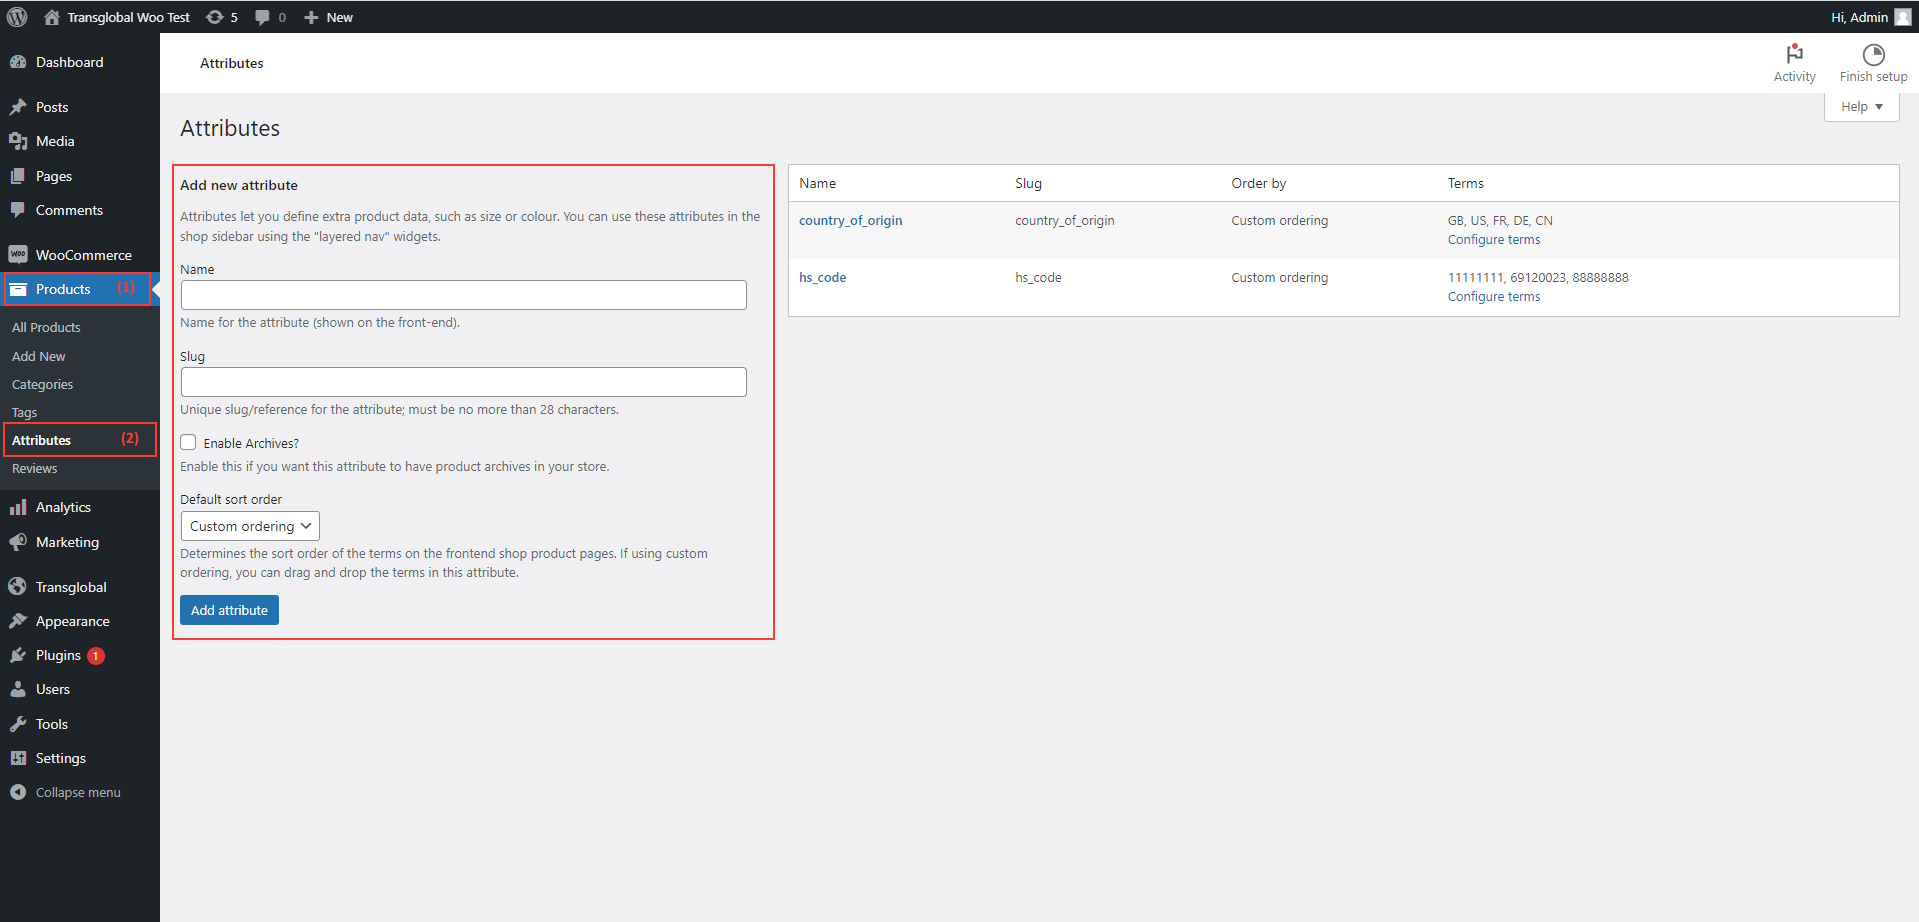
First, click Products on the lefthand menu, and then select Attributes from submenu, which should open the attributes screen in the main window pane. There is a simple form to create an attribute. The only important field for our purposes is the "Name" field. We look for two separate attributes:
- hs_code
- country_of_origin
Add these attributes. Once added they will appear on the right, as in the screenshot below:
The next step is to assign values for these attributes for your products. To get started, navigate to the product details page of your product and on the submenu click Attributes.
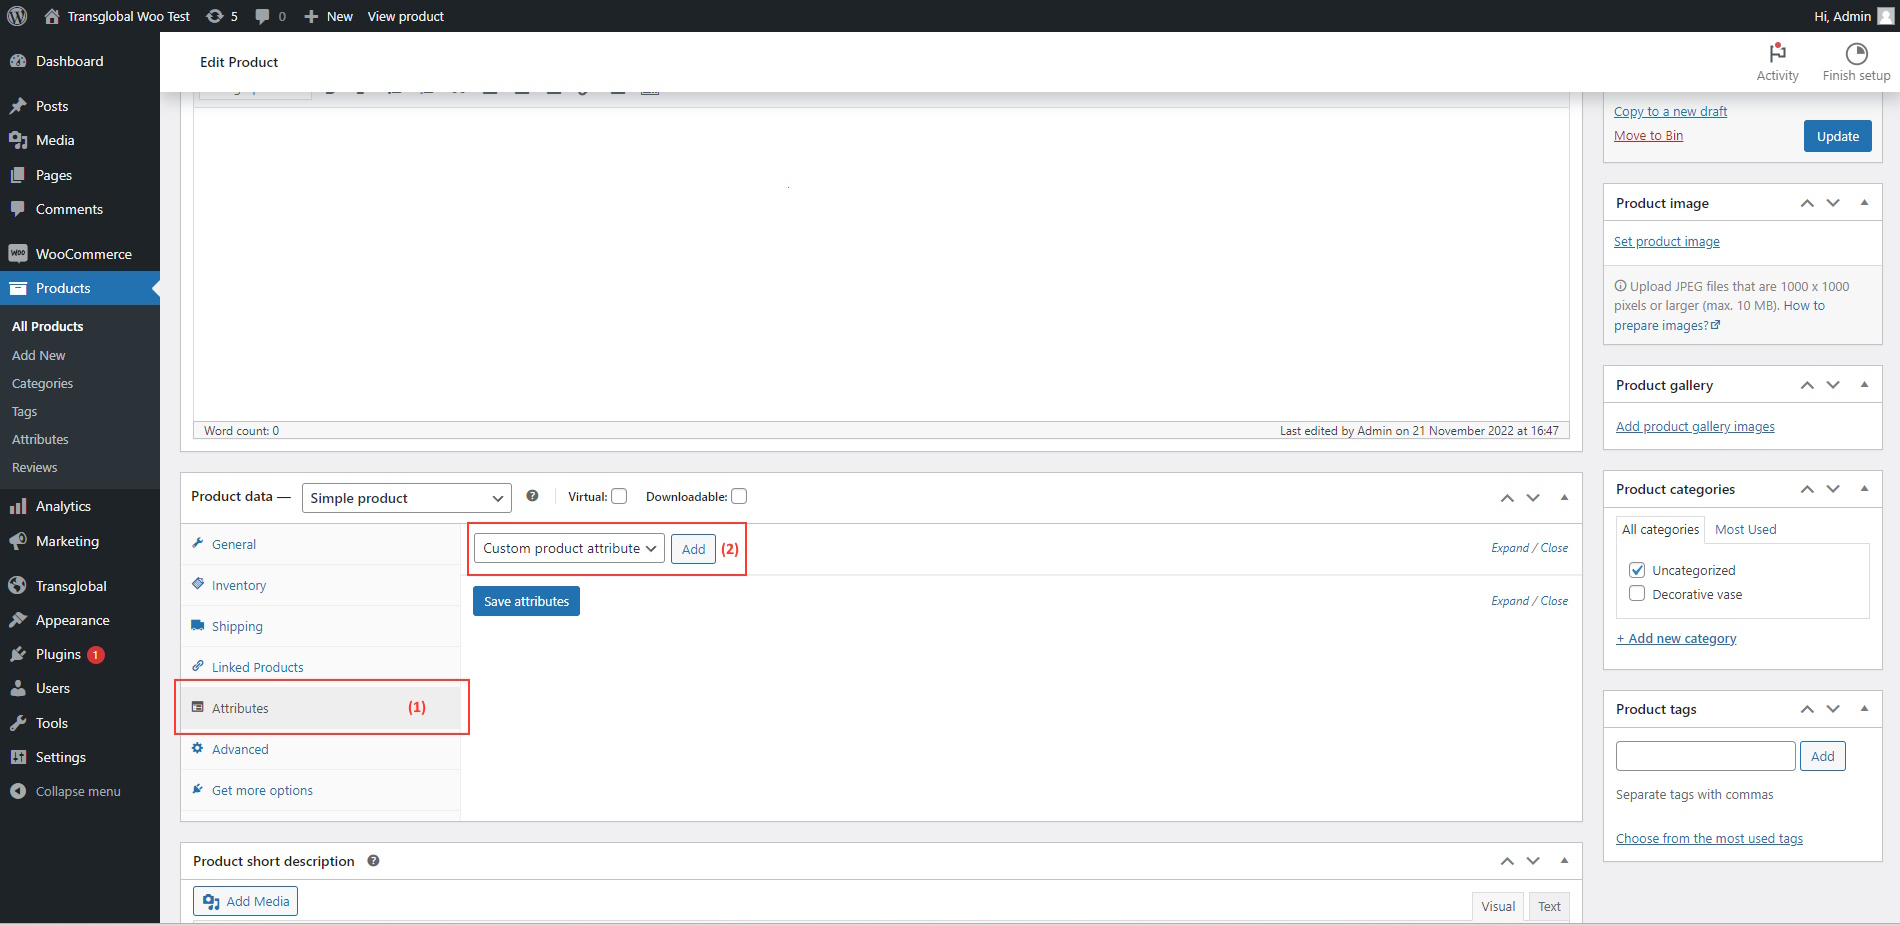
The attributes you added to your store should appear in the dropdown list:
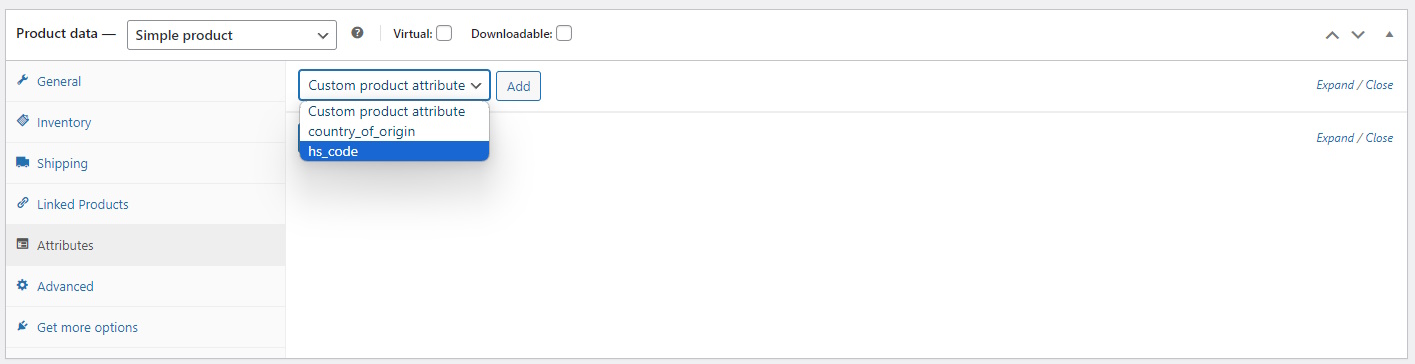
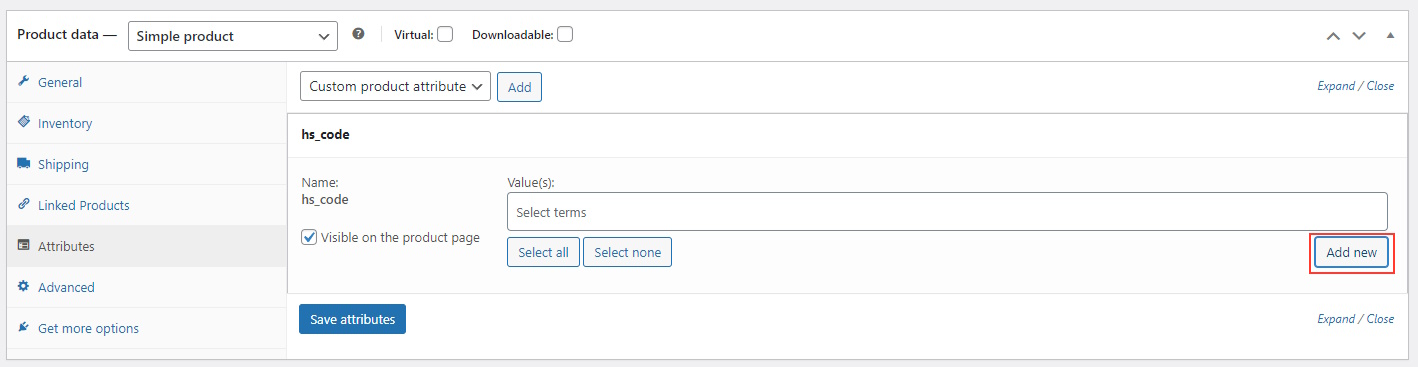
After selecting the attribute you wish to select, click the Add button. You will see a form as below. While it looks like you should be able to type the value you want in the text box, a value will only appear here if it has already been set for another product. Otherwise you should click the Add new button
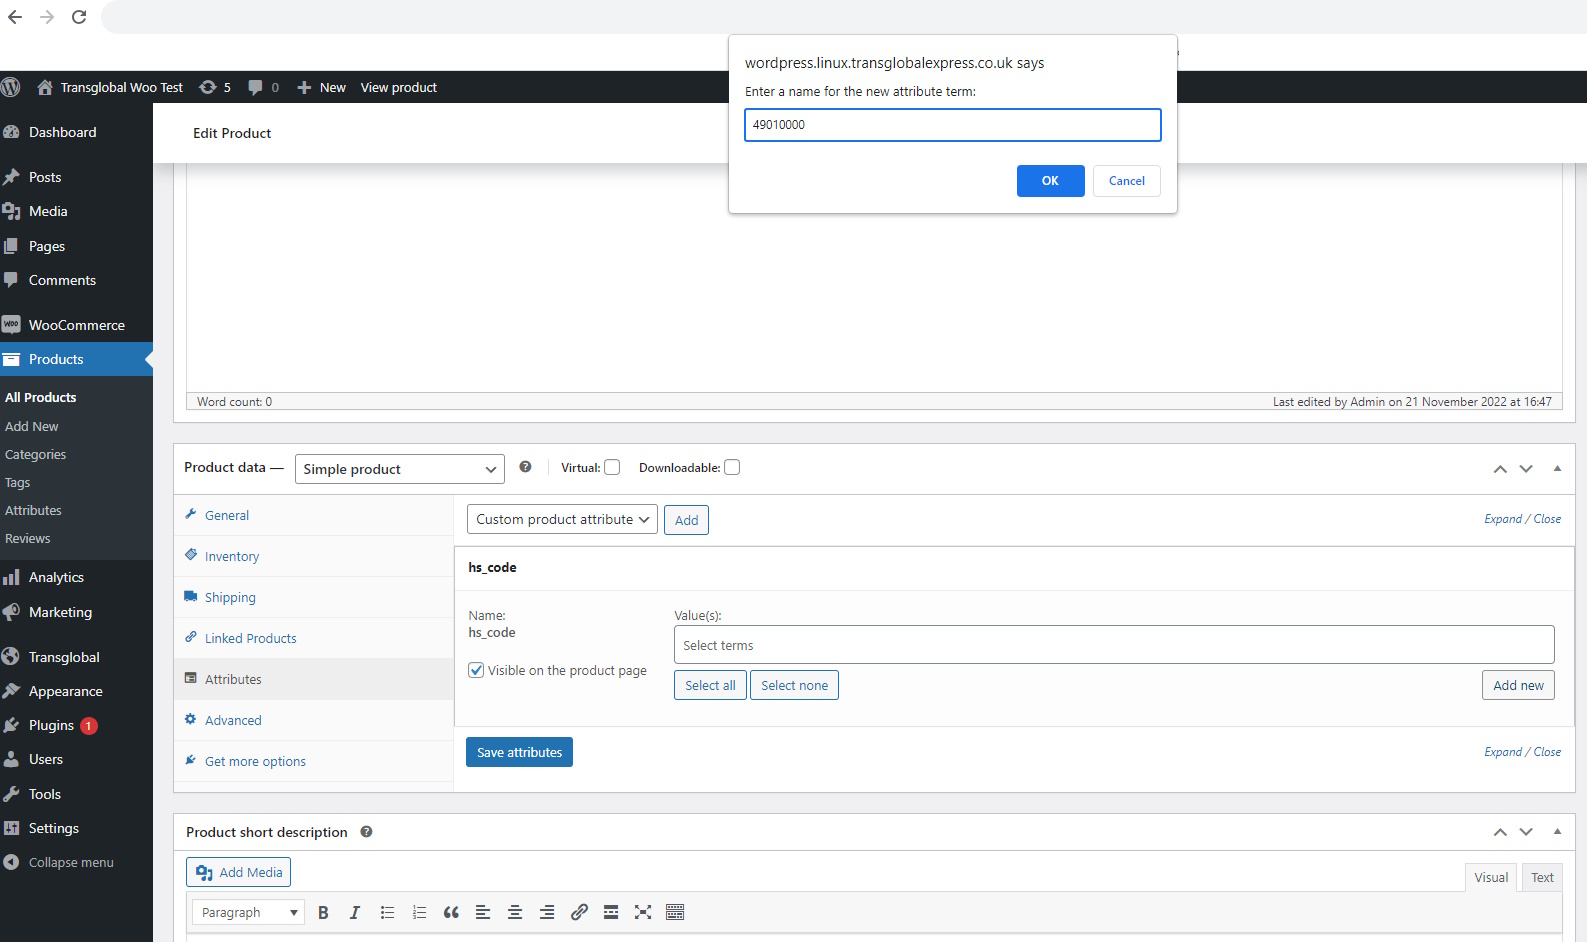
A browser input popup box will appear. Enter your attribute value in the popup box and click OK to confirm.
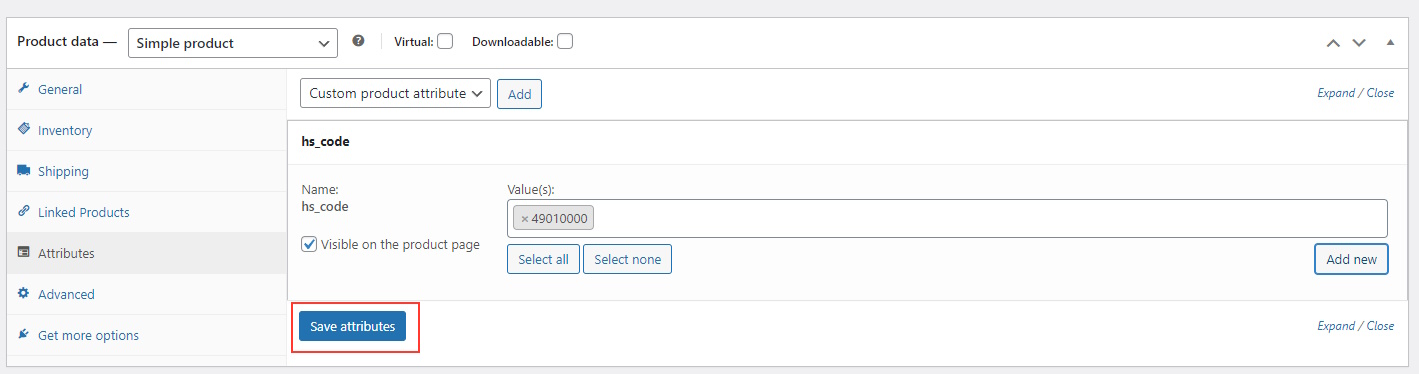
The value will then appear in the product attribute details. Click Save attributes and the attribute will be saved for the product.
You can set the hs_code and/or country_of_origin attribute(s) on as many products as you wish, or none. While it can be time-consuming, if you are shipping internationally regularly it may be worth it to have imported orders already populated with this information, eliminating the need to enter it manually for each order as required.
Step 2 - Transglobal Website
You are now set up on your WooCommerce store! The next step is to input the credentials you generated into the Transglobal system, so we can start importing your order details. To start, log in to your account on the Transglobal Express website and navigate to the WooCommerce Credentials Page
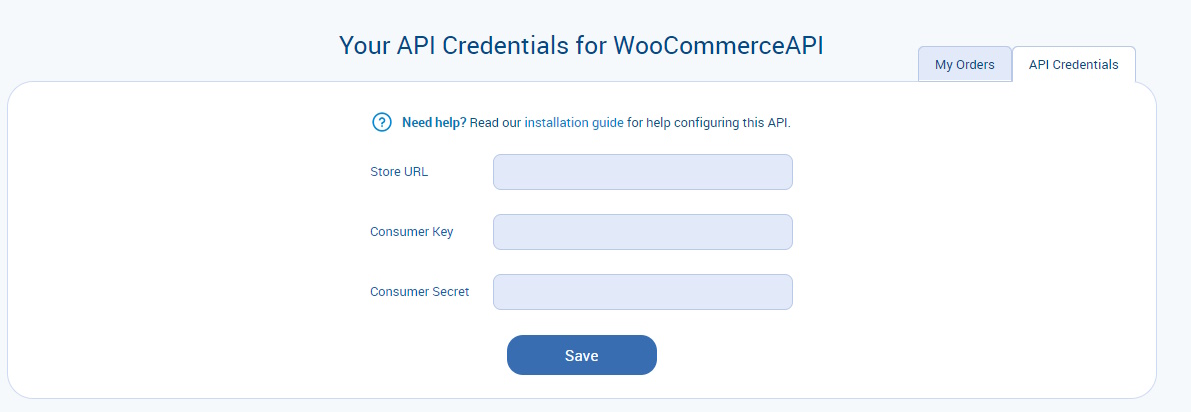
From here you should input your WooCommerce website URL (e.g. https://www.mywoocommercestore.co.uk/), as well as the consumer key and consumer secret that you generated and made note of earlier. Once these details have been entered, click Save and we will attempt to make contact with your store.
Once a connection has been successfully made, you will be notified onscreen that the integration was successful. Now you can can navigate to your WooCommerce Order Imports Page
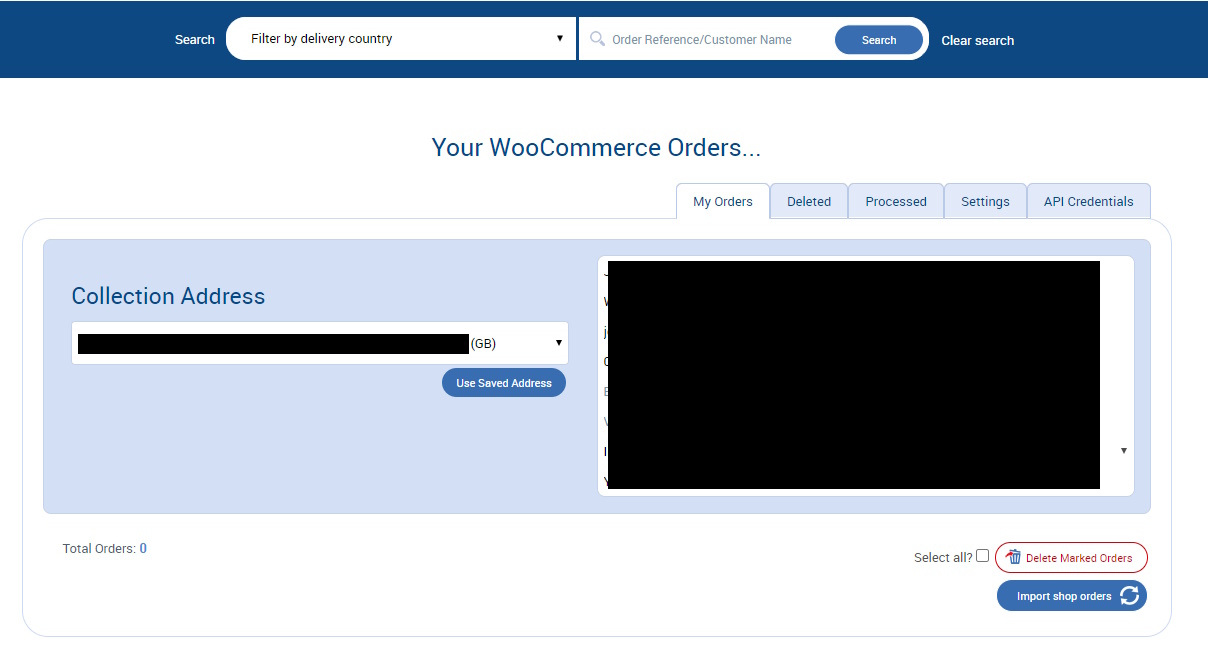
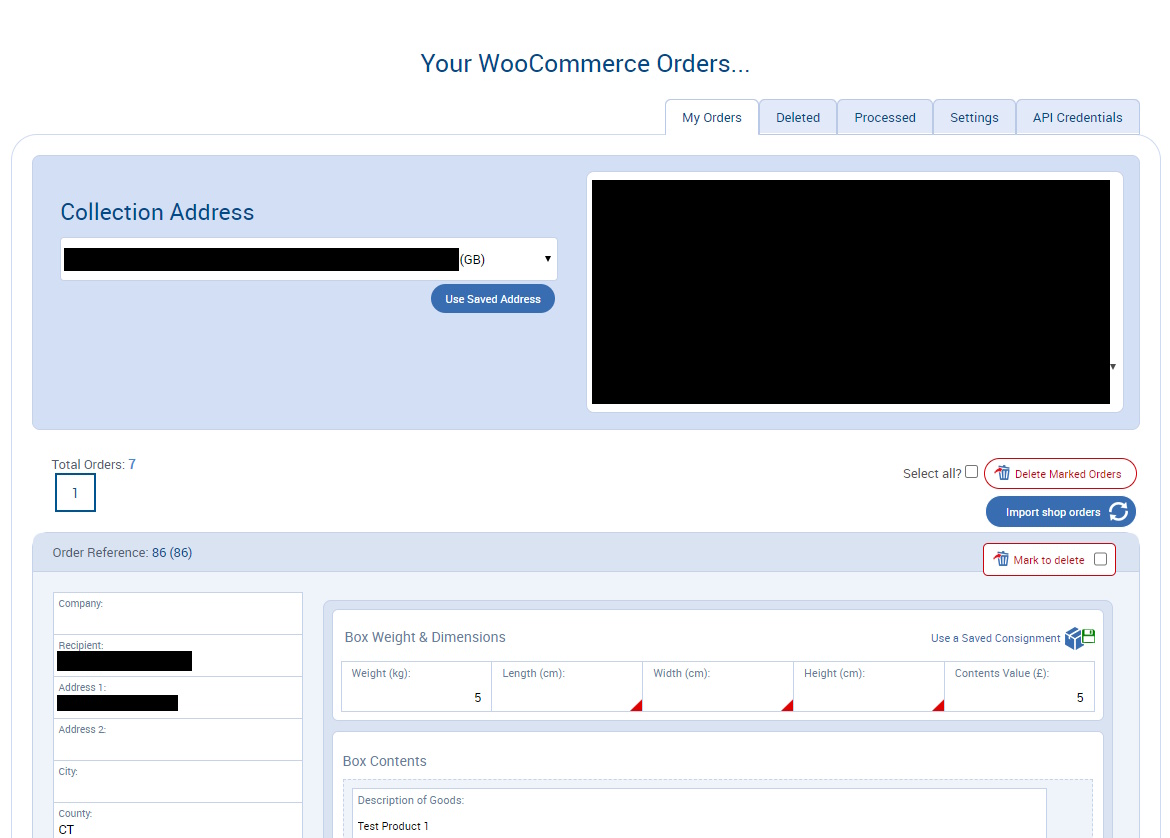
Click the Import shop orders button to import any new orders. The button will "grey out" while we are working on importing your orders. Once finished, any new orders found will appear onscreen. From this page you will be able to quote, add to basket and check out, booking your orders as normal.
And that's it - job done!
For more information on using our importer tool to book shipping, see How to use shop order importers.

Be the first to know about the latest services